Generally, the Lorex INB9252B bullet cameras are the leading next-gen surveillance devices. These come with 4K Ultra HD resolution and 30FPS record timings. Additionally, to use these surveillance devices to their full extent, you need to configure them. Likewise, to learn the lorex lnb9252b bullet camera setup instructions and detailed setup, you must read this guide.
In this brief piece of content, we shed light on the step-by-step instructions to carry out the setup process. Also, you can explore the primary necessities and guidelines to begin the lorex wireless camera setup without any hassle. So, to get more details, stay connected to this page!
Explore the lorex lnb9252b bullet camera setup instructions
Moreover, before you initiate the Lorex bullet camera configuration, it is necessary to learn the guidelines first. In this section, you will learn the important instructions to carry out the lorex lnb9252b bullet camera setup. Let’s have a look:
- To begin with, power up your Lorex bullet CCTVs.
- Next, bring your DVR/NVR/PoE switch and the provided cables in the box.
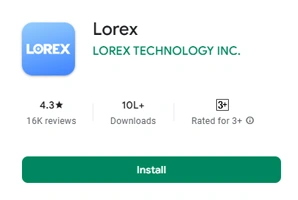
- Further, install the Lorex application on your smartphone.
- Place the cameras, network connection system, and router closer to each other.
- Ensure stable network connectivity and strong signal strength.
- Look that you have a nearby power source otherwise, you can use an extension.
- Connect your cameras to the power supply and turn them on (Wired models). If you are using wireless cams, then charge them completely and power them on.
For NVR/PoE switch: Connect an ethernet cable to the router>NVR. Similarly, bring another network cable and link to the NVR>camera.
LAN network connection: Attach the ethernet cord to the Router>NVR, take another wire, and join to the Router>PoE switch. Now, bring one more network cable and connect it to the PoE switch>Camera.
For the DVR system: First, grab the provided ethernet cable and link it to the router. After that, connect the power adaptor to the DVR and power it on.
Here, you are ready to proceed with the lorex wireless camera setup.
How to execute the lorex lnb9252b bullet camera setup using the app?
Additionally, when you are ready with the things required to start the setup process of your security cams. Next to this, run the app and create an admin account first. If you are an existing user, then log in using the valid admin credentials. Further, to learn the lorex lnb9252b bullet camera setup app process, walk through this section:
- Firstly, connect your smartphone to the home network.
- After that, link your NVR/PoE switch or DVR system to the Lorex bullet camera and router.
- Next, run the Lorex application and create a new user account.

- If you are already using the app, then login to your existing account.

- After logging in, tap on the “+” icon and add a camera to the app dashboard.
- At the same time, add your DVR/NVR/PoE switch to the app by following the guidelines.
- Hereon, you are asked to scan the QR code on your security camera, hence scan the code.
- Further, the app will scan for the available networks, and a list of available networks is shown to you.
- Hereon, choose your home network and enter a password for it.
- Follow the in-app lorex lnb9252b bullet camera setup instructions to connect the camera to the router’s network.
- Afterward, you can configure the additional camera settings, such as motion detection, audio, video clarity, etc.
- Next, click on Save/Apply to secure the settings you made.
- Go back to the app menu and check the live view of the camera.
- Finally, you are all set with the lorex lnb9252b bullet camera setup app procedure.
In essence, this brief guide will help you to understand the lorex lnb9252b bullet camera setup instructions in brief and configure the camera. Here, you find detailed setup steps among easy troubleshooting tips to resolve the setup issues. For more info, stay tuned to our next posts!